How to DIY LED walls correctly?
If you want to take a hands-on approach to assembling your own LED wall, but you don’t know what materials you need and how to put it together. It’s actually far easier than you think to install these components, and today I’m going to guide you on how to properly DIY an LED wall.
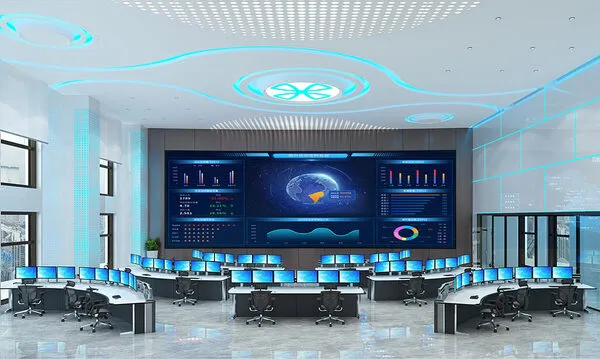
Understanding how an LED wall works
Before we talk about how to set up the LED wall, we need to first understand how the LED wall works. LED wall is formed by hundreds or even thousands of LED modules for splicing; and LED modules are arranged by light-emitting diodes in the form of a grid throughout the PCB board, in which each light-emitting diode is able to emit light on its own. LED modules are encapsulated using special packaging techniques, such as SMD, COB, GOB and other packaging technologies.
What we need to know before DIY LED wall
Goal Setting
First of all, we have to decide how high resolution LED wall we want, then we have to decide the size of the screen, LED pitch size, LED display refresh rate and so on.
Choosing the location for installation
After that we need to consider where we will DIY the LED wall and need the location to have enough blank wall to be able to put down the size size you have chosen, such as the height, width, and depth of the build.
Have enough budget
To build your own LED wall, first we need to have enough budget to buy the resolution of the LED modules you want as well as all the materials and tools. The budget is not just enough to buy the materials and tools, but also to set aside some money to pay for the other costs that come with the installation process.
All the materials needed
If you want to make a DIY LED wall, then materials are definitely needed. For example, the size of your LED wall is 4 meters in width, 3 meters in height and 25 centimeters in depth, and you should apply P5 pitch LED modules to form your LED wall; if you are not sure which LED pitch meets the display effect you want, you can consult us.
Then all the materials needed are:
220 pieces of 320x160mm LED modules for assembling the LED display.
12 cabinets of 960x960mm, or 6 cabinets of 1280x1280mm, can directly use the magnetic adsorption will be adsorbed and fixed in front of the LED module, effectively saving space and the cost of late maintenance.
230 power connecting wires to connect the power module and LED module.
About 234 signal wires and 76 signal connecting wires.
24 x 1×0.5m steel structures, the steel structures chosen need to have super high stability and strong load-bearing capacity, because they have to bear the weight of the whole LED wall.
Usually we need a power supply for 6 LED modules, so we need to prepare 36 power supplies, using power connecting cables to connect the power supply module to the PCB board, to energize the display for circuit work.
12 to 18 control system, use signal cable to transfer the signal from the control system to the PCB panel, can better control the LED display.
What installation tools are needed:
Lots of screws
Screwdriver
Electric drill
Wrench
Soldering iron
Hot glue
Duct tape
Wire strippers
Measuring tools (tape measure, level)
Circuit Pen
Soldering tools
Stairs
Prepare enough space
We now know all the materials and tools needed for the DIY LED wall. After we have purchased all the materials, we also need a spacious warehouse to store the raw materials to avoid losing them during the installation process etc.
Starting the DIY LED wall

Mark the size on the wall
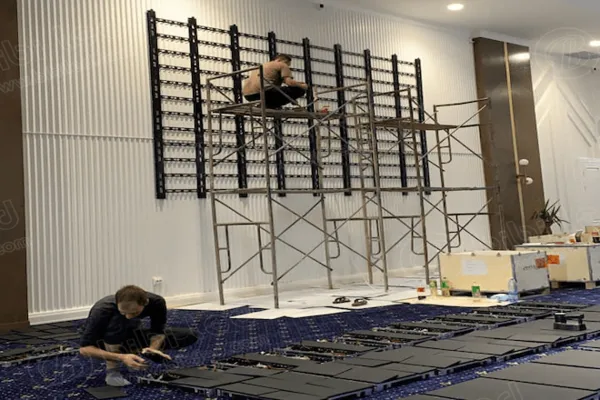
First of all, we will be 24 1×0.5m steel structure according to the planned installation location, in order from low to high to drill holes, and then fixed with screws, and then welded with welding tools will be 24 steel structure welded together with each other, which can effectively avoid the installation of the display is not at the same level later on, but also to ensure that the steel structure of the firm.
Assembly cabinet
Cabinet usually can choose two kinds, in order to better distinguish, we use 960x960mm cabinet to calculate today. So we plan the width of 4 meters, 3 meters high need to use 12 cabinets.
Installing the cabinets
We need to use the stairs to install the cabinets slowly, the installation process we need to carry out a number of screws through the holes, and the use of screws to fix the cabinets with the steel structure.
Testing the cabinets
After assembling the 12 cabinets, we test the cabinets by using a spirit level to measure whether the entire cabinet is at the same level and whether it is solid, in order to ensure that the next step will not cause damage to the raw materials, which may cause delays in the entire project.
Assembly of the power supply and control system
The next step is to assemble the power supply and control system inside the cabinet, if you are in general a cabinet to install 3 power supplies and 1 controller; if you want to buy better control software, I advance you a few brands, Nova star, Linsn, Colorlight, Hui du and so on.
Arrange the LED module
Power supply and control system assembled, our next step to try to arrange the LED module, any of several LED modules arranged next to each other, and then observe the surface whether there are obvious cracks, if not, we can go on to the next step!
Connect the power supply
We will just arrange the LED module removed, and then use the power cord to connect each module with the power supply, note that the power supply should also be connected to the power supply.
Connecting the signal cable
After connecting the power supply, we go to use the signal cable to connect the LED module near the control system and the control system, and then go to use the signal cable to connect the LED module, so as to transmit the signal, after the connection, but also to ensure that the LED module is seamless between the state.
Assembling the LED modules
Now that we have learned how to connect the power supply and signal lines, the next step we can follow this method, the LED module piece by piece with the LED cabinet for splicing, this process must have patience, to avoid the LED module surface of the lamp beads were worn out or fall phenomenon.
Test the whole LED wall
After carefully assembling the LED module, we can carry out the test of the LED wall, the following is that we can go to this aspect of the comprehensive test:
First of all, check whether the power and signal lines are loose or not connected to ensure that each LED module can be normal power and signal reception.
Secondly, connect the external audio, adjust different volume to sound check.
Again, connect the computer and control system, synchronize or asynchronous control of the whole display image and play video, test the refresh rate, viewing angle, smoothness of the screen and so on.
Finally, the brightness of the test, to ensure that the entire display lamp beads are able to operate normally, if found dead lights can be replaced in a timely manner.
How to maintain the LED wall later
After splicing a good LED wall, follow-up care is essential. Through the later maintenance work can extend the life of the LED wall, but also timely detection of problems, to ensure a sustainable visual experience. Here are some ways to maintain the LED wall:

Regular cleaning: If we find that the brightness of a certain place is not up to the original standard, you can check the appearance of whether it is caused by dust or some objects blocking, if it is covered with dust, you can use a dry towel to gently wipe off the dust, if it is blocked by the object to take it down can be.
Replacement of the LED module: If neither of these two causes, then we need to take out the LED module to observe and diagnose what the cause, if it can not be repaired in a timely manner to replace another LED module.
Diagnosis and screening: If you are following the manufacturer’s instructions, but still occurs this brightness is not up to standard or the phenomenon of a continuous black screen, you can ask a professional to come to the door into the maintenance; if you are sure that it is not because of their own reasons, you can communicate with the LED module manufacturer and send a new LED module.
Timely update the control software: keep the LED processor software for the latest version is particularly important, which can play a role in enhancing the existing features and patching security holes, adding new security features.
Summarize
In conclusion, we have learned all about how to DIY LED wall. If you want to do it yourself in the near future, I still want to clarify with you, for do-it-yourself to build the LED wall, which requires a lot of time and money to invest in a huge challenge; if you have determined to do it yourself, you can also feel free to boldly try, even if it fails, but also in the failure to learn from experience, and continue to improve, so as to get the ideal LED wall.