Taxi Top LED Sign Installation Guide
How to Install Your Taxi Top LED Sign might seem daunting at first. Many taxi operators struggle to get their LED signs mounted safely and efficiently.
Installing a taxi top LED sign is more than just attaching it to your vehicle. You need to consider vehicle compatibility, wiring, safety, and long-term maintenance. Many drivers attempt DIY installation without proper guidance, leading to flickering lights, loose mounts, or even electrical hazards. This guide exists to provide a clear, step-by-step approach, ensuring your sign works flawlessly while avoiding common mistakes.
By following this guide, you will gain practical knowledge on tools, installation techniques, safety precautions, and troubleshooting tips. You will leave with the confidence to install your taxi top LED sign efficiently, whether you are a solo driver or managing a fleet. This article also highlights professional tips and insights that can save time, reduce errors, and maximize your investment in a high-quality LED display.

Preparing for Installation
Before starting, preparation is key. Proper planning ensures a smooth installation and prevents costly mistakes. Gathering the right tools, understanding your LED sign components, checking safety measures, and confirming vehicle compatibility will save time and improve results.
Tools and Materials You’ll Need
To install your taxi top LED sign efficiently, you’ll need the following:
- Screwdrivers and Wrenches: For mounting brackets and securing bolts.
- Drill and Drill Bits: If your vehicle requires custom holes for mounting.
- Measuring Tape and Level: To ensure proper alignment and balanced positioning.
- Wire Strippers and Electrical Tape: For connecting the sign to the vehicle power safely.
- Safety Gear: Gloves, eye protection, and non-slip shoes.
- Sealant or Weatherproofing Tape: To prevent water leakage at mounting points.
Having all these tools ready before starting avoids interruptions and reduces installation errors. Missing a critical tool often leads to improper mounting and potential safety hazards.
Understanding Your Taxi Top LED Sign Components
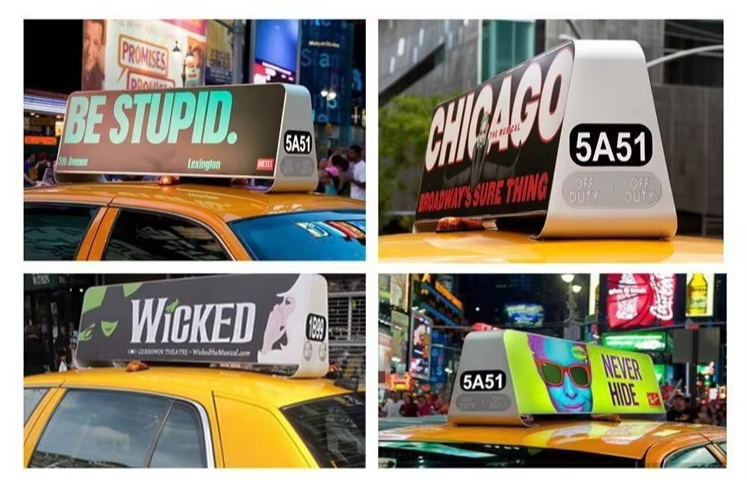
A typical taxi top LED sign includes:
- LED Display Panel: The main screen showing messages or advertisements.
- Mounting Brackets: Secure the sign to the vehicle roof.
- Control Box: Manages the display content and settings.
- Power Cable and Connectors: Connects the sign to the vehicle’s electrical system.
- Weatherproof Housing: Protects electronics from rain, dust, and debris.
Understanding each component is essential. It helps you anticipate how parts fit together, where wiring should run, and which sections need extra protection against weather conditions.
Safety Precautions Before You Start
Safety must be your top priority. Electrical hazards and falls are common risks during installation. Key precautions include:
- Disconnecting the vehicle battery before wiring.
- Using a stable ladder or platform when mounting the sign.
- Wearing protective gear to avoid injuries from sharp edges or tools.
- Ensuring your work area is clear of obstacles and pedestrians.
Taking these precautions can prevent accidents and ensure the installation process is smooth and secure.
Checking Vehicle Compatibility and Roof Load Limits
Not all vehicles are suitable for every taxi top LED sign. Before installation, verify:
- Roof Size and Shape: Ensure the sign fits without overhang or obstruction.
- Weight Capacity: Check your vehicle’s roof load limit. Signs that exceed this limit can damage the roof or affect vehicle stability.
- Power Supply Compatibility: Confirm the vehicle’s electrical system can handle the LED sign’s voltage and current requirements.
Neglecting vehicle compatibility can lead to serious damage or unsafe driving conditions. Always consult the vehicle’s manual or manufacturer if uncertain.
Step-by-Step Installation Guide
Installing a taxi top LED sign requires careful attention to detail. Following each step precisely ensures a secure fit and reliable operation. The process involves positioning, mounting, wiring, and testing the sign before finalizing the installation.
Step 1 – Positioning and Aligning the Sign
Begin by placing the sign on the roof to determine its optimal position. The sign should be centered, straight, and aligned with the vehicle’s roofline. Use a measuring tape to ensure equal overhang on both sides. A level can help verify that the sign sits perfectly horizontal, which is crucial for both aesthetics and wind resistance.
Consider how visibility affects your advertising impact. Signs that are angled incorrectly or placed off-center can reduce readability from key viewing angles, especially for passengers and nearby vehicles. Take time to visualize the sign from multiple perspectives before drilling or securing brackets.
Step 2 – Mounting the Brackets Securely
Once aligned, attach the mounting brackets to the vehicle roof. Ensure that the brackets are fastened tightly using appropriate screws or bolts, following the manufacturer’s instructions. If the vehicle requires pre-drilled holes, double-check measurements before drilling to avoid misalignment.
Mounting brackets not only hold the sign in place but also absorb vibrations from driving. Using high-quality bolts and applying thread-locking compound can prevent loosening over time, extending the lifespan of your installation.
Step 3 – Wiring and Connecting to the Vehicle Power
Next, connect the LED sign to the vehicle’s electrical system. Begin by running the power cable from the sign’s control box to the battery or fuse box. Strip wires carefully, connect with proper terminals, and insulate all connections with electrical tape or heat shrink tubing.
Avoid routing wires near sharp edges, moving parts, or areas exposed to excessive heat. Secure cables with zip ties to prevent dangling wires that could short or become damaged. Following proper wiring protocols reduces flickering issues and ensures consistent performance.
Step 4 – Testing the LED Sign Before Final Fixing
Before finalizing, turn on the sign to verify it works correctly. Check for flickering, dead pixels, or alignment issues. Test the remote control or software interface to confirm that messages display accurately.
Early detection of wiring errors or alignment problems saves time and prevents future maintenance headaches. A fully functional test before securing the sign eliminates guesswork and ensures a professional finish.
Step 5 – Securing the Sign and Final Checks
After testing, fully secure the sign using brackets, bolts, and any additional fasteners. Apply sealant or weatherproof tape around mounting points to protect against water ingress. Perform a final visual inspection and gentle shake test to ensure the sign is stable and vibration-resistant.
Driving at various speeds during the first few days allows you to monitor any shifts or vibrations. Tighten hardware as needed. Properly securing the sign reduces wear and prevents accidents caused by loose components.
Common Installation Challenges and How to Avoid Them
Even with careful preparation, several issues can arise during or after installing a taxi top LED sign. Being aware of these challenges and how to prevent them ensures long-term performance and safety.
Loose Mounts and Vibrations
Loose brackets or bolts can cause the sign to wobble, rattle, or even detach while driving. Ensure all mounting hardware is tightened according to specifications, and use thread-locking compounds for extra security.
Frequent vibration can damage internal LED circuits over time. Checking brackets periodically and replacing worn washers or fasteners can extend the sign’s lifespan and maintain a professional appearance.
Wiring Errors and Flickering Issues
Incorrect wiring often leads to flickering or a complete loss of function. Double-check polarity, secure all connections, and use quality terminals. Insulate exposed wires thoroughly to avoid shorts.
Use a multimeter to verify voltage and continuity before powering the sign fully. Following the manufacturer’s wiring diagrams prevents damage to both the LED sign and your vehicle’s electrical system.
Weatherproofing and Water Leakage Problems
Water infiltration can corrode circuits or cause shorts. Apply sealant around all roof penetrations and use weatherproof housing for exposed components. Check for gaps where water can enter, especially along bracket edges.
Even small leaks can lead to expensive repairs. Investing in high-quality sealants and performing seasonal inspections reduces maintenance costs and prevents downtime.
Avoiding Common DIY Mistakes
Common DIY mistakes include misalignment, over-tightening brackets, and improper cable routing. Take your time, follow the step-by-step instructions, and refer to your LED sign manual.
Many DIY installers underestimate wind resistance. Signs that are not properly secured or angled incorrectly can create lift at high speeds, potentially damaging the vehicle roof or causing accidents. Consulting professional tips during installation can prevent these costly errors.
Maintaining Your Taxi Top LED Sign
Proper maintenance ensures your LED sign remains bright, functional, and safe for years. Regular care prevents premature failure and reduces long-term costs.
Regular Cleaning and Inspection
Clean your LED sign at least once a month using a soft cloth and mild detergent. Avoid abrasive materials that can scratch the display. Inspect mounting brackets, screws, and wiring for signs of wear, corrosion, or damage.
Accumulated dirt, bird droppings, or debris can reduce visibility and block ventilation, causing overheating. Regular cleaning improves readability, enhances your brand image, and extends the life of your sign.
Ensuring Long-Term Electrical Safety
Check all electrical connections periodically. Tighten loose wires, replace frayed cables, and confirm the control box remains dry and secure. Ensure the vehicle’s battery and fuse system can safely support the LED sign’s power requirements.
Ignoring electrical safety can lead to flickering, component damage, or even fire hazards. Using proper insulation, cable clips, and periodic voltage checks keeps the system stable and reliable.
Firmware Updates and Control System Maintenance
Many modern taxi top LED signs come with programmable control systems. Regularly update firmware and software to access new features, fix bugs, and improve performance. Check the manufacturer’s instructions for recommended update intervals.
Outdated firmware can cause display errors, slow response times, or compatibility issues with remote management tools. Staying current ensures smooth operation and enables advanced functionalities like dynamic messaging or remote diagnostics.

DIY vs Professional Installation
Deciding between installing the taxi top LED sign yourself or hiring a professional depends on your experience, tools, and risk tolerance. Understanding the pros and cons of each option helps you make an informed decision.
When to Attempt Installation Yourself
DIY installation is suitable if you have basic mechanical and electrical skills. You should attempt it only when confident in following step-by-step instructions and using proper tools safely. Small fleets or individual drivers with time and patience can benefit from cost savings.
DIY installers must be meticulous about alignment, wiring, and weatherproofing. Any shortcuts can lead to flickering lights, loose mounts, or electrical hazards. Use checklists and consult the sign’s manual thoroughly before proceeding.
Benefits of Professional Installation Services
Professional installers bring experience, specialized tools, and knowledge of vehicle-specific mounting requirements. They can complete the installation faster, more securely, and with fewer errors. For larger fleets, professional services reduce downtime and ensure consistency across vehicles.
Professionals can also advise on optimal sign placement, electrical integration, and compliance with local regulations. They often offer post-installation support and warranty coverage, providing peace of mind.
Cost Comparison and Time Efficiency
While DIY saves on labor costs, it may require several hours and carries higher risk of mistakes. Professional installation has upfront costs but can prevent expensive repairs or replacements. Consider the value of your time, safety, and potential liability when deciding.
| Installation Type | Time Required | Cost Estimate | Pros | Cons |
| DIY | 3-6 hours | $0-$50 (tools) | Cost-saving, learning experience | Risk of mistakes, longer time |
| Professional | 1-2 hours | $150-$300 | Fast, secure, expert guidance | Higher upfront cost |
For fleet operators, consistency and reliability outweigh minimal DIY savings. Professional services often provide documentation and quality assurance that DIY cannot match.

Conclusion
Installing a taxi top LED sign does not have to be complicated. With proper preparation, the right tools, and a clear step-by-step approach, you can achieve a secure, functional, and long-lasting installation. Understanding components, following safety protocols, and addressing common challenges ensures your sign performs reliably and enhances your visibility on the road.
Whether you choose DIY installation or professional services, prioritizing safety, alignment, and electrical integrity is essential. Regular maintenance, cleaning, and firmware updates will extend the lifespan of your LED sign and protect your investment.